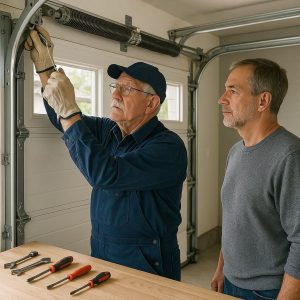
When it comes to achieving flawless and durable laminate floor installation, a combination of proper preparation, precise technique, and high-quality materials is essential. Laminate floors are a great option for homeowners seeking an affordable yet stylish flooring solution. However, without the right approach, even the best laminate can suffer from premature wear, gaps, and uneven surfaces. This guide will reveal the secrets to ensuring a successful laminate floor installation that lasts for years to come.
Key Takeaways:
- Proper Preparation is Key: Acclimating laminate planks, cleaning and leveling the subfloor, and installing a moisture barrier are essential for ensuring a durable and stable installation.
- Use the Right Tools: Accurate measurements, proper cutting tools, and spacers are crucial for a flawless laminate floor installation.
- Stagger Seams for Natural Look: Staggering the seams of laminate planks improves aesthetics and adds strength to the overall floor structure.
- Leave Expansion Gaps: Always leave a ¼-inch expansion gap between the planks and the walls to allow for expansion and contraction.
- Regular Maintenance: Keep laminate floors clean, use furniture pads to avoid dents, and address any damage promptly to extend their lifespan.
Understanding Laminate Flooring
Before diving into the steps for successful installation, it’s crucial to understand what laminate flooring is and why it’s a popular choice for many homes. Laminate flooring is a synthetic product designed to mimic the appearance of wood, stone, or other natural materials. It consists of multiple layers, including a wear layer, design layer, core layer, and backing layer. The wear layer is the protective surface that prevents scratches, stains, and fading, while the core layer provides stability and durability.
Types of Laminate Flooring
There are two main types of laminate flooring: glued-down laminate and floating laminate. Floating laminate is the most common and involves interlocking planks that are laid down without glue or nails, making it easier to install and replace. On the other hand, glued-down laminate is permanently adhered to the subfloor, which offers additional stability but requires a more meticulous installation process.
Preparing for a Successful Laminate Floor Installation
Proper preparation is the first secret to achieving a long-lasting laminate floor. Without it, even the best installation efforts can be undermined by improper surface preparation or environmental factors. Follow these key steps to prepare your space:
1. Acclimate the Laminate Flooring
Before beginning installation, it’s essential to allow the laminate planks to acclimate to the room’s temperature and humidity. This prevents the material from expanding or contracting once installed. Leave the planks in the room where they will be installed for at least 48 hours prior to laying them down.
2. Clean and Level the Subfloor
A clean, dry, and level subfloor is crucial for ensuring laminate installation success. Remove any debris, nails, or staples from the subfloor. If the subfloor is uneven, use a leveling compound to create a smooth surface. For concrete subfloors, ensure there is no moisture buildup, as this can affect the laminate’s stability.
3. Install a Moisture Barrier
For laminate flooring to last, especially in areas prone to humidity such as bathrooms or kitchens, installing a moisture barrier is essential. This barrier prevents moisture from seeping into the laminate planks, which can cause them to warp or deteriorate over time.
The Right Tools for Laminate Floor Installation
Using the right tools will significantly improve the efficiency and outcome of your laminate floor installation. Essential tools include:
- Tape Measure: For accurate measurements of the room and laminate planks.
- Utility Knife: For cutting laminate planks to the desired size.
- Spacers: To maintain the required expansion gap around the edges of the floor.
- Rubber Mallet: To gently tap planks into place without damaging them.
- Jigsaw or Circular Saw: For cutting around obstacles like doorways or vents.
- Pull Bar: For tightening the seams of the laminate planks.
Step-by-Step Guide to Laminate Floor Installation
Now that you’re prepared, it’s time to move forward with the installation process. Here is a detailed step-by-step guide to ensure the job is done right.
Step 1: Plan the Layout
Start by planning the layout of the laminate flooring. Begin installation along the longest wall to ensure the planks run parallel to the room’s length. It’s also advisable to stagger the seams of the planks to create a natural, more appealing appearance. Use a chalk line to mark a straight reference line on the subfloor.
Step 2: Install the First Row
Place the first row of planks along the reference line, ensuring that there is an expansion gap of about ¼ inch between the planks and the wall. This gap allows the laminate to expand and contract with changes in temperature and humidity. Use spacers to maintain this gap.
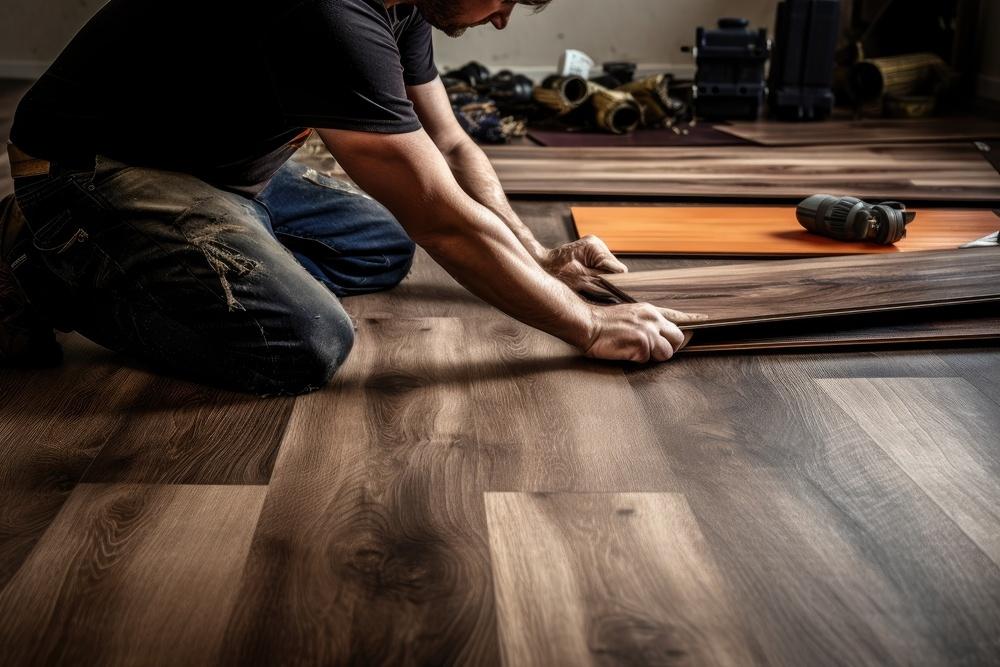
Step 3: Lock the Planks Together
Most laminate flooring comes with a click-lock system that allows you to easily snap the planks into place. Begin at one end of the row and work your way across the room, ensuring that the planks lock securely together. Use a rubber mallet to gently tap the planks into place if necessary.
Step 4: Cut the Last Row
As you near the end of the room, you may need to cut the last row of planks to fit. Measure the gap between the final row and the wall, then cut the planks accordingly. Use a jigsaw or circular saw to make the cuts. Be sure to leave the required expansion gap.
Step 5: Finish with Transitions and Baseboards
Once all the planks are installed, add transition strips at doorways and between rooms to provide a smooth transition from one type of flooring to another. Install baseboards or quarter round along the perimeter of the room to cover the expansion gap and give the floor a finished look.
Maintaining Your Laminate Floors
Even though laminate flooring is highly durable, it requires proper maintenance to keep it looking great over the long term. Here are a few tips to extend the life of your laminate floors:
1. Regular Cleaning
Clean your laminate floors regularly to prevent dirt, dust, and debris from scratching the surface. Use a microfiber mop and a mild cleaner designed for laminate floors. Avoid using excessive water, as it can seep into the seams and cause damage.
2. Avoid Heavy Furniture
While laminate flooring is durable, it can be scratched or dented by heavy furniture. Use furniture pads or coasters to distribute the weight of furniture and protect the floor from damage.
3. Repair Damage Promptly
If you notice any damage to your laminate floor, such as scratches or chips, it’s important to address it immediately. Some laminate flooring brands offer repair kits to help fix minor issues, ensuring your floor remains intact and appealing.
Troubleshooting Common Laminate Floor Installation Problems
Even with careful preparation and installation, some issues may arise. Here are solutions to common laminate floor installation problems:
1. Uneven Seams
If the seams between laminate planks appear uneven, it could be due to improper locking or the subfloor not being level. To fix this, carefully lift the affected planks and check for any debris or imperfections on the subfloor. Reinstall the planks, ensuring they lock securely.
2. Gaps Between Planks
Gaps between planks can occur if the expansion gap is not sufficient, or if the planks were not locked correctly. If the gap is small, a floor gap-filler can be used to remedy the issue. For larger gaps, you may need to remove the affected planks and reinstall them correctly.
Achieving a long-lasting laminate floor installation comes down to preparation, the right tools, and careful attention to detail. By following these secrets, you can ensure your laminate floors remain durable and attractive for years to come. Whether you’re tackling the installation yourself or hiring a professional, these tips will guide you toward a successful and long-lasting laminate floor installation.
How can I ensure my laminate floor lasts long?
To maximize the longevity of laminate floors, proper preparation is vital. Clean and level the subfloor, install a moisture barrier, and leave necessary expansion gaps. Additionally, regular cleaning and prompt repair of any damages will extend the floor’s life.
What are common mistakes in laminate floor installation?
Common mistakes include neglecting to acclimate the planks, not maintaining proper expansion gaps, and installing planks without ensuring the subfloor is clean and level. These errors can lead to warping, uneven surfaces, and damage to the laminate flooring over time.
How can I ensure my laminate floor lasts long?
Gaps can be caused by incorrect locking or insufficient expansion gaps. For small gaps, use a floor gap filler. For larger gaps, carefully remove the affected planks, adjust the expansion gap if needed, and reinstall the planks correctly to close the gap.